
How to Record High-Quality Home Music Tips for DIY Musicians

Unlocking the Secrets of Quality Home Recording
In today’s music landscape, DIY musicians have access to tools that rival professional studios. With advancements in technology, capturing high-quality home music has become more achievable than ever. However, it’s essential to understand the nuances that can elevate your recordings from amateur to outstanding.
Creating music at home doesn’t just involve hitting the record button; it demands a nuanced approach that encompasses various aspects of production. Understanding these elements will help you harness the full potential of your home studio, regardless of your genre or experience level.
Equipment Selection
Investing in the right tools is pivotal in ensuring professional sound quality. A high-quality microphone can drastically improve vocal clarity and presence. For instance, condenser microphones are favored for their sensitivity and range, making them perfect for capturing vocals and acoustic instruments. Meanwhile, dynamic microphones are often chosen for their durability and versatility in live settings. Additionally, an audio interface acts as the crucial bridge between your instruments/microphones and your computer, enhancing sound quality while you record.
Equally important are studio monitors. Unlike standard speakers, studio monitors provide a flat frequency response, allowing you to hear your recordings accurately. Brands like Yamaha and KRK have models that are widely respected for home studio setups.
Acoustic Treatment
Equally vital is your recording environment. Acoustic treatment can make or break a recording. Unwanted noise and echo can seep into your recordings and muddle your sound quality. To combat this, consider adding sound-absorbing materials like foam panels or heavy curtains to dampen reflections. Even simple solutions such as rugs or bookshelves can help with sound dispersion. This simple adjustment can make your recording space sound more professional, allowing your tracks to shine.
Recording Techniques
Mastering fundamental recording techniques can drastically enhance your music’s professional quality. Layering tracks can build depth and richness. For example, by recording multiple harmonies of a vocal line, you create a fuller vocal performance that captivates listeners. Additionally, mic placement is crucial. Experimenting with distance and angles can lead to different tonal qualities that you might prefer for various instruments. Mixing is another vital aspect, allowing you to balance levels, adjust EQ settings, and add effects. Understanding these elements will elevate not just individual tracks but the entire mix.
In conclusion, whether you’re a singer-songwriter, a band, or a producer, understanding and utilizing these critical elements can significantly impact your sound quality. With the right strategies and a bit of experimentation, you can produce tracks that stand out in a crowded market. Remember, the journey of creating high-quality music is both exciting and fulfilling, inviting you to explore the depths of your creativity. So, grab your gear and let’s embark on this thrilling expedition into the world of high-quality music production.
SEE ALSO: Click here to read another article
Understanding Audio Science
Before diving into the practicalities of home recording, it’s essential to grasp some fundamental audio science. Familiarize yourself with the concepts of frequency, dynamic range, and dynamic processing, as they serve as the backbone of good sound. Frequencies, measured in Hertz (Hz), relate to how high or low a sound is. Understanding the frequency spectrum helps you make informed decisions when recording and mixing, allowing for richer and more balanced tracks.
Dynamic range refers to the difference between the quietest and loudest parts of a recording. Striking the right balance is crucial in achieving a clear sound without distortion. This is where dynamic processing comes into play. Tools such as compressors and limiters help maintain the integrity of your sound by controlling volume levels, avoiding distortion, and allowing you to place your sonic elements effectively within the mix.
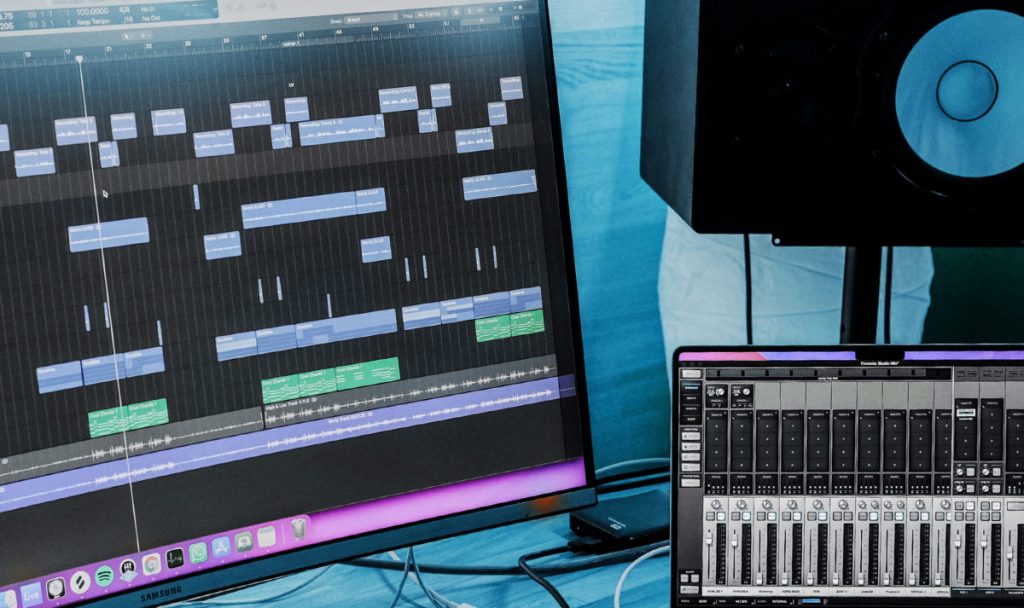
Choosing the Right Software
Once you’ve established your hardware, the next pivotal step in home recording is selecting digital audio workstation (DAW) software. A DAW serves as the core platform for recording, editing, and mixing your music. Popular options like Pro Tools, Logic Pro X, and Ableton Live cater to different needs and musical styles, allowing you to tailor your experience to your specific preferences.
When choosing a DAW, consider the following:
- User interface: Ensure it aligns with your comfort and workflow.
- Supported plugins: Compatibility with virtual instruments and effects enhances creativity.
- Budget: Many DAWs offer a range of prices; explore open-source options like Audacity or Cakewalk for cost-effective solutions.
Recording Levels and Techniques
Proper recording levels are another cornerstone of high-quality music production. Aim to keep your signals in the green zone of your DAW meter, ideally peaking around -6 dB. This buffer from 0 dB prevents clipping and distortion, which can severely degrade sound quality. Once you’ve achieved a solid recording level, it’s time to explore different recording techniques.
One technique often overlooked is the use of a click track. A click track, or metronome, keeps your timing consistent, especially if you’re layering multiple instruments or harmonies. In addition, utilizing the natural ambiance of your recording space can add character to your tracks. Consider capturing the subtle nuances of room sound, which can enrich the musicality of your recordings.
In summary, understanding the science of audio, choosing the right DAW, and adhering to proper recording levels and techniques are all integral to achieving high-quality home music production. By investing thought and care into each step, DIY musicians can significantly enhance their sound quality, paving the way for standout tracks in an already crowded musical space.
Essential Equipment for High-Quality Recordings
When it comes to recording high-quality music at home, having the right equipment is crucial. From microphones to digital audio interfaces, each piece plays a significant role in the final output of your recordings. Here’s a breakdown of essential gear DIY musicians should consider:
Microphones
A good microphone can make or break your recording. For vocals, consider a cardioid condenser microphone, which captures sound with clarity and warmth. For instruments, dynamic microphones are often more versatile and suitable, especially when recording louder sounds like drums or electric guitar amps.
Audio Interface
An audio interface is a vital tool for connecting your microphone and instruments to your computer. Look for one that offers high sample rates and bit depths, as this enhances sound quality. Additionally, interfaces with built-in preamps can help boost your microphone signal, ensuring a smoother recording process.
Headphones and Monitors
Investing in quality studio headphones and monitors can significantly improve your mixing and monitoring experience. Closed-back headphones are great for recording, as they prevent sound leakage, while studio monitors provide a neutral sound profile, essential for making accurate mix decisions.
Software
Digital Audio Workstations (DAWs) like Ableton Live, Pro Tools, or FL Studio are indispensable for editing and mixing your recordings. These platforms offer a variety of plugins and effects that can enhance your tracks. Many DAWs also provide built-in tutorials to help you navigate the basics.
Recording Techniques for Superior Sound
Alongside having the right gear, applying effective recording techniques is essential for capturing that high-quality sound.
Room Acoustics
The environment in which you record plays a crucial role in the overall sound quality. Consider investing in acoustic treatment, such as sound panels or bass traps, to minimize echoes and background noise. Alternatively, consider recording in a small, quiet room filled with soft furnishings that can help absorb sound.
Setup and Positioning
Proper microphone placement can dramatically affect your recordings. Experiment with positioning your mic about 6-12 inches away from the sound source, angling it to capture the best tonal quality. This not only enhances clarity but also minimizes unwanted background noise.
Take Multiple Takes
Never hesitate to record multiple takes of your performance. This not only captures the best version of your music but also allows for better mixing options later. When you are editing, you can splice together the best moments from each take to create a seamless final track.
Collaborate and Network
As a DIY musician, connecting with other artists can lead to incredible opportunities for collaboration and learning. Utilize online platforms, social media, and local music communities to meet fellow musicians, producers, and sound engineers. By sharing experiences and knowledge, you can both enhance your skills and expand your creative horizons.To further prepare you for success, the following table summarizes essential advantages and considerations for DIY musicians:
| Category | Description |
|---|---|
| High-Quality Gear | Investing in quality microphones and audio interfaces improves sound capture and overall production quality. |
| Acoustic Treatment | Improving room acoustics can significantly enhance your recording environment, allowing for clearer, more professional-quality audio. |
With the right tools and knowledge, you can create high-quality music in the comfort of your own home. Delve deeper into each element to discover how to elevate your recording process further!
CHECK OUT: Click here to explore more
Microphone Selection and Placement
Choosing the right microphone can dramatically influence the quality of your recordings. The type of mic used can be categorized into dynamic and condenser mics. Dynamic microphones are durable and excel in high-volume settings, making them ideal for live performances and instruments like drums. On the other hand, condenser microphones, which are more sensitive, pick up a broader range of frequencies and are perfect for vocals and acoustic instruments. When selecting a microphone, consider not only the type but also the characteristics that align with your sound, such as polarity patterns (cardioid, omnidirectional, etc.) that distinguish where sound is captured from.
Once you’ve chosen your microphone, the next step is placement. The positioning of your microphone can dramatically impact the final sound. For vocals, the mic should be placed about 6 to 12 inches away from the singer’s mouth. This distance helps to prevent plosive sounds (like “p” and “b”) from overpowering the recording. For instruments like guitars or pianos, try different placements to determine what best captures their unique tonal characteristics. Experimenting with the 3:1 rule—placing mics three times the distance apart from each other as their distance from the sound source—can help eliminate phase issues and create a more cohesive sound.
Utilizing Effects and Processing
A well-crafted music production involves more than just recording instruments and vocals; it also requires careful mixing and processing. Familiarization with effects such as reverb, delay, and EQ (equalization) can enhance the quality of your recordings significantly. Reverb can create a sense of space and depth, especially for vocals. A little goes a long way; too much can muddy your mix, detracting from clarity.
Delay effects can add richness and fullness to your sound. Try using short delays to thicken vocals or create rhythmic interest on guitars. The same applies to EQ, which allows you to shape frequencies by cutting or boosting certain areas. For example, consider removing some low frequencies in vocals to make them clearer or accentuating certain highs in a guitar to let it shine through the mix.
Recording in Ideal Conditions
Recording in a controlled environment is vital for high-quality sound capture. If possible, use a quiet room or space that minimizes external noise. Invest in acoustic treatment such as foam panels, baffling curtains, or even simple DIY solutions like heavy blankets. These measures can help reduce unwanted reflections and echoes that obscure the sound quality. The goal is to create a space where the sound can breathe and stay true to its intended character.
Consider your recording time as well. Picking quieter times of day, such as early mornings or late evenings, can reduce interruptions from outside noises. Another effective method of controlling your recording environment is to identify and eliminate sources of interference like air conditioning units or loud appliances that can disrupt clear audio capture.
By making informed choices about microphones, placement, effects, and the recording environment, you are laying the groundwork for producing high-quality music that resonates with listeners. Each component, from mic selection to environmental conditions, plays a crucial role in achieving the polished sound you desire as a DIY musician.
SEE ALSO: Click here to read another article
Conclusion
In the ever-evolving landscape of music production, understanding the essentials of home recording has never been more vital for DIY musicians aspiring to create high-quality tracks. As we’ve explored, the journey begins with thoughtful microphone selection and careful placement, both of which are pivotal in capturing the essence of your sound. Remember, the choice between dynamic and condenser mics—along with their unique positioning—cannot be overlooked, as it lays the foundation for your recordings.
Moreover, the artistry of mixing and processing your tracks using effects like reverb, delay, and EQ enhances the auditory experience. Mastering these tools opens up a world of possibilities, allowing your music to truly resonate with listeners. But beyond technical choices, creating an ideal recording environment is key to achieving that polished sound. Simple adjustments to the room setup or even the time of day can drastically improve the clarity of your recordings.
Ultimately, each of these elements is interconnected, and their combined effect can elevate your music to new heights. As a DIY musician, staying curious and willing to experiment is crucial. Delve deeper into your recordings, learn from each session, and refine your process. With these tips, you’re not just gearing up to record music; you’re engaging in a rewarding creative journey. Embrace the challenges, enjoy the process, and let your artistry shine through—because the world deserves to hear what you have to share.